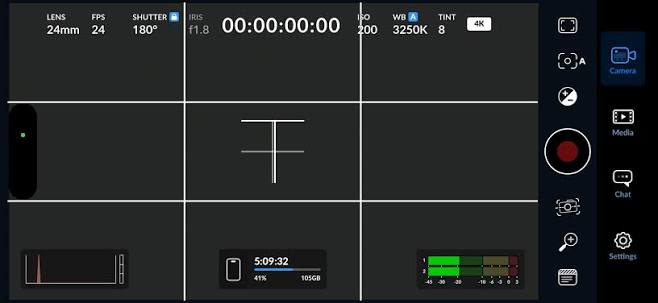
There is a persistent myth in the content creation world that you need a £2,000 DSLR camera and a massive lens to shoot top-tier videos. The truth? The smartphone in your pocket is a cinematic powerhouse. Modern iPhones are more than capable of capturing stunning, high-converting content for platforms like OnlyFans, IWantClips, and Clips4Sale.
However, simply hitting the 'record' button is not enough. To elevate your videos from amateur home movies to premium clip store content, you need to master a few essential shooting techniques. Here is your ultimate guide to unlocking your iPhone’s full potential.
1. Optimise Your Camera Settings
Before you set up your scene, you need to familiarise yourself with the iPhone's core settings. Go into your main 'Settings' app, scroll down to 'Camera', and make these adjustments:
- Resolution & Frame Rate: Always shoot in 4K at 60fps (frames per second) for highly active, fast-moving scenes, as it provides incredibly smooth motion. If you want a softer, more traditional movie feel (great for slow tease videos), drop the frame rate to 4K at 30fps.
- Turn on the Grid: This overlays a 3x3 grid on your screen. It is crucial for keeping your camera level and framing your shots using the 'Rule of Thirds' (placing your points of interest along the lines or intersections, rather than dead centre).
- Disable Auto-HDR Video: While High Dynamic Range sounds great on paper, the iPhone’s automatic HDR can sometimes make skin tones look artificial or overly processed when uploaded to third-party sites. Test your lighting with it off for a more natural colour palette.
2. Ditch the Selfie Camera
This is the most common mistake new creators make. It is tempting to use the front-facing (selfie) camera so you can watch yourself perform. However, the rear-facing camera system has vastly superior lenses, larger sensors, and better low-light performance.
The Fix: Invest in a cheap swivel mirror and attach it to the back of your ring light or phone tripod, or simply use an Apple Watch to preview your shot. Always use the rear camera for your final master clips.
3. Master the AE/AF Lock
Have you ever watched a video where the brightness keeps flashing up and down, or the focus constantly blurs in and out? That happens because the camera is set to 'Auto', and it is constantly trying to guess what it should look at.
To fix this, utilise the AE/AF Lock (Auto Exposure / Auto Focus Lock). Frame your shot, press and hold on the main subject (usually your face or body) on the screen until a yellow box appears with "AE/AF LOCK" written at the top. Next to the box, you will see a sun icon—slide this up or down to manually perfect the brightness. The camera will now hold this exact lighting and focus, no matter how much you move.
4. Lighting is Everything
An iPhone sensor is incredibly small compared to a professional camera. This means it desperately needs good light to avoid grainy, pixelated footage.
- Embrace Natural Light: If you are shooting during the day, position yourself facing a large window. The soft, natural daylight wraps around the skin beautifully. Never film with the window directly behind you, or you will turn into a dark silhouette.
- Artificial Lighting Setup: If shooting at night, a ring light is a great starting point for flat, even lighting. For a more professional, three-dimensional look, invest in a pair of softbox lights. Place your key (main) light at a 45-degree angle to your face, and a secondary, dimmer light on the opposite side to fill in the shadows.
5. Stabilisation, Rigs, and Angles
Propping your £1,000 phone up against a stack of books or a coffee cup is a recipe for disaster. For static, solo scenes, invest in a sturdy, adjustable tripod. It instantly makes your content feel more deliberate and professional.
Shooting with a Partner or Operator: If someone else is filming you—whether it is a partner capturing POV content or a dedicated camera operator—handheld phone footage can quickly become unwatchably shaky. This is where a smartphone rig becomes a game-changer.
Brands like SmallRig or Beastgrip produce incredibly affordable, professional metal cages that your iPhone slots right into. These rigs transform your phone into a proper cinema camera in several ways:
- Dual Handles: You can attach grips to both sides of the cage. This forces the operator to hold the camera with two hands, instantly stabilising the footage and allowing for silky-smooth panning and tracking shots.
- Mounting Points: Rigs are covered in 'cold shoe' mounts and threaded screw holes. This allows you to easily attach a shotgun microphone for crisp audio, or a mini LED panel light directly to the camera to ensure your face is always perfectly lit, even when moving around a room.
Angles: Finally, experiment with angles to convey different moods. A slightly high angle (shooting slightly down at you) is universally flattering and creates an intimate feel. Conversely, a low angle (shooting up) establishes dominance and power, which is perfect for specific fetish or domination niches.
Final Thoughts
Your iPhone is a tool, and like any tool, the results depend entirely on the skill of the person using it. By taking five extra minutes to lock your exposure, check your lighting, use a proper rig or tripod, and utilise the superior rear camera, you will dramatically increase the perceived production value of your clips—leading to happier subscribers and higher sales.